

MacOS Permissions
Request the right macOS permissions and Info.plist settings so your Desktop SDK app can record meetings successfully without issues.
Permissions are not needed on WindowsWindows does not require you to request any additional permissions. Any permission requests made on Windows will immediately succeed, and the permission will enter the
grantedstate.
MacOS places restrictions on desktop applications that will prevent you from recording meetings out of the box. You must request access permissions from the end user before you'll be able to record their meetings.
Quickstart
By default, the Desktop SDK automatically requests permissions for accessibility, microphone, and screen-capture whenever it starts up. This is all you need to start recording, so once the user grants them, your app is ready to record. However, rather than having the permission dialogs pop up immediately and one after another, it's often preferable to control when you request for access, so that you can have custom UI for the permission flow.
To do this, you'll need to initialize the SDK with acquirePermissionsOnStartup: [], and then request permissions using the RecallAiSdk.requestPermission SDK method. To record meetings, you'll need at least the accessibility, microphone, and either the screen-capture or system-audio permission. You can request system-audio if you don't need video of the meeting. Otherwise, request screen-capture.
const RecallAiSdk = require('@recallai/desktop-sdk');

await RecallAiSdk.init({
  apiUrl: "https://us-west-2.recall.ai",
  acquirePermissionsOnStartup: []
});

await RecallAiSdk.requestPermission("accessibility")
await RecallAiSdk.requestPermission("microphone")
await RecallAiSdk.requestPermission("screen-capture")
Requesting a permission will cause a popup to appear on your user's computer, prompting them to either open their system settings or deny the permission request.
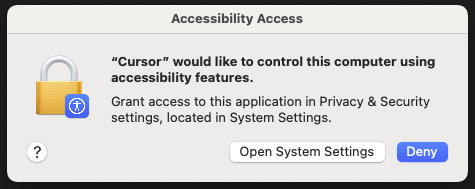
When in development, the name of your application will be the application that's running your Electron process (e.g. VS Code, Cursor, iTerm)
A permission will always be in one of three states: not_requested, granted, or denied. If the user denies your request for a particular permission, you will not be able to request permission again. Instead, you will need to show a message in your application's UI directing the user to go to their system settings and enable the permission manually.

Example UI directing the user to open System Settings after they've denied a permission.
Justify why you need permissions to the userA user is more likely to grant your app the required permissions if they know why you need them. We recommend presenting an explanation of the reason you need a permission in your application's UI before you request it. See the permissions table for justifications of each individual permission.
Once you've requested permissions, you'll also need to understand whether the user approved or denied your request. To do this, you can add an event listener for the permission-status event:
  RecallAiSdk.addEventListener('permission-status', (evt: PermissionStatusEvent) => {
    const { permission, status } = evt
    console.log(`Permission: ${permission}, Status: ${status}`)
  })
After all permissions have been granted, you're ready to start recording meetings for your users on MacOS.
macOS PLIST Configuration for Audio Capture Permissions
When building a macOS application that captures audio, you must properly configure your app’s Info.plist with the required usage description keys. This ensures that macOS can display the appropriate system permission dialogs to users.
This documentation covers both:
- System audio capture
- Microphone (input) capture
1. System Audio Capture Requirement
To request permission for capturing system audio (e.g., via screen/audio capture frameworks or SDKs like DSDK), your app must include the following key in its Info.plist:
Required Key
<key>NSAudioCaptureUsageDescription</key>
<string>Your explanation of why the app needs to capture system audio</string>
Important Notes
-
This key is mandatory in production builds.
-
If this key is missing, macOS will:
- NOT display the system audio permission dialog
- Silently prevent your app from requesting audio-only capture permission
-
The description string should clearly explain to users why system audio access is needed.
Example
<key>NSAudioCaptureUsageDescription</key>
<string>This app captures system audio to record meetings and playback sessions.</string>
2. Microphone Capture Requirement
In order to record from the microphone, you must include the standard microphone permission key:
Required Key
<key>NSMicrophoneUsageDescription</key>
<string>Your explanation of why the app needs microphone access</string>
Example
<key>NSMicrophoneUsageDescription</key>
<string>This app uses the microphone to record your voice during calls.</string>
Your app may crash if these entries are not provided.
Available permissions
Below is a table of all the permissions that you can request on MacOS, along with the reasons that they are required:
| Permission | Required | Purpose |
|---|---|---|
accessibility | Yes | We use the Accessibility permission to automatically detect meetings and figure out who is speaking during a meeting. |
microphone | Yes | We use the Microphone permission to record your audio during meetings. |
screen-capture | Required to capture both audio and video. If you only need audio, request system-audio. | We use the Screen Capture permission to record the audio of participants other than yourself, and the video of all participants in your meetings. |
system-audio | Required to capture only audio. If you need both audio and video, request screen-capture. | We use the System Audio permission to capture the audio of participants other than yourself in your meetings. |
full-disk-access | No | We use the Full Disk Access permission to extract the meeting URL from Teams meetings. |
Updated about 2 months ago