

Google Calendar
Creating Google OAuth 2.0 Client
You must enable the calendar api before starting this guideYou must enable the Google Calendar API in the project in order to interact with it. More info here https://support.google.com/googleapi/answer/6158841
To enable this feature, first setup an OAuth2.0 client following the steps below.
-
Obtain Google OAuth 2.0 client credentials. You can follow the steps provided here https://support.google.com/googleapi/answer/6158849?hl=en.
-
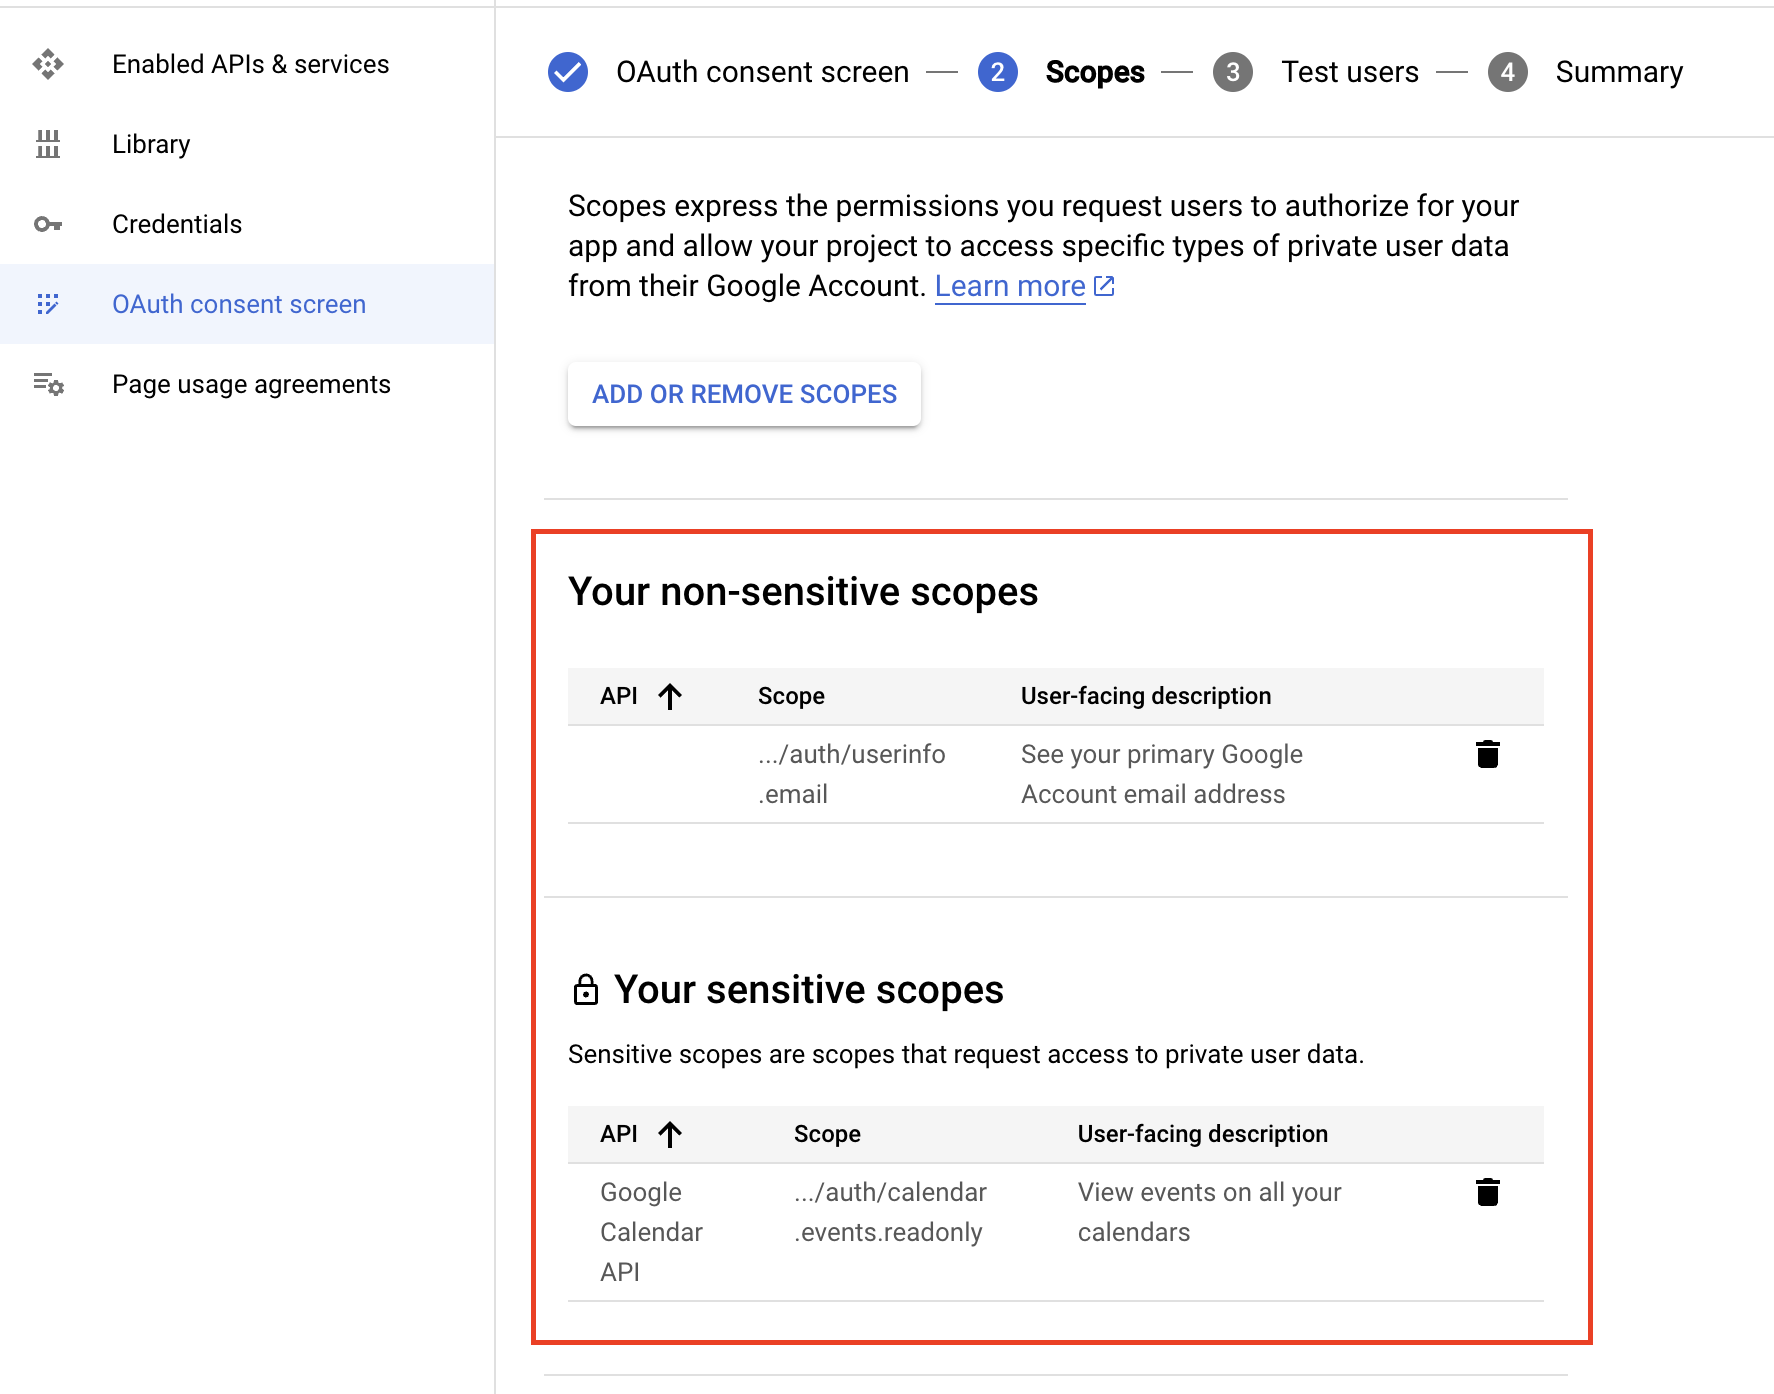
Configure permission scopes
calendar.events.readonly&userinfo.emailin the consent screen section.
- Add Authorized redirect URI in the Credentials section. This will be the URL the user is redirected to after they authorize your app via Google OAuth 2.0
You must verify ownership of the domain used for the Authorized redirect URI. Domain verification is required when publishing your OAuth 2.0 in production.
This URL must not include Recall's domain and should originate from your own app.
Implement OAuth 2.0 Authorization Code Flow
https://developers.google.com/identity/protocols/oauth2/web-server#obtainingaccesstokens
Code samples from Calendar V2 Demo Repository:
- https://github.com/recallai/calendar-integration-demo/blob/v2/v2-demo/logic/oauth.js
- https://github.com/recallai/calendar-integration-demo/blob/v2/v2-demo/routes/oauth-callback/google-calendar.js#L27
Going to Production: Getting Approval
The first step in the approval process is to fill out your app information. You should do so at the following link: https://console.cloud.google.com/apis/credentials/consent/edit

You must use your own app's name because the Google app reviewer will need to identify your app during the app approval process.
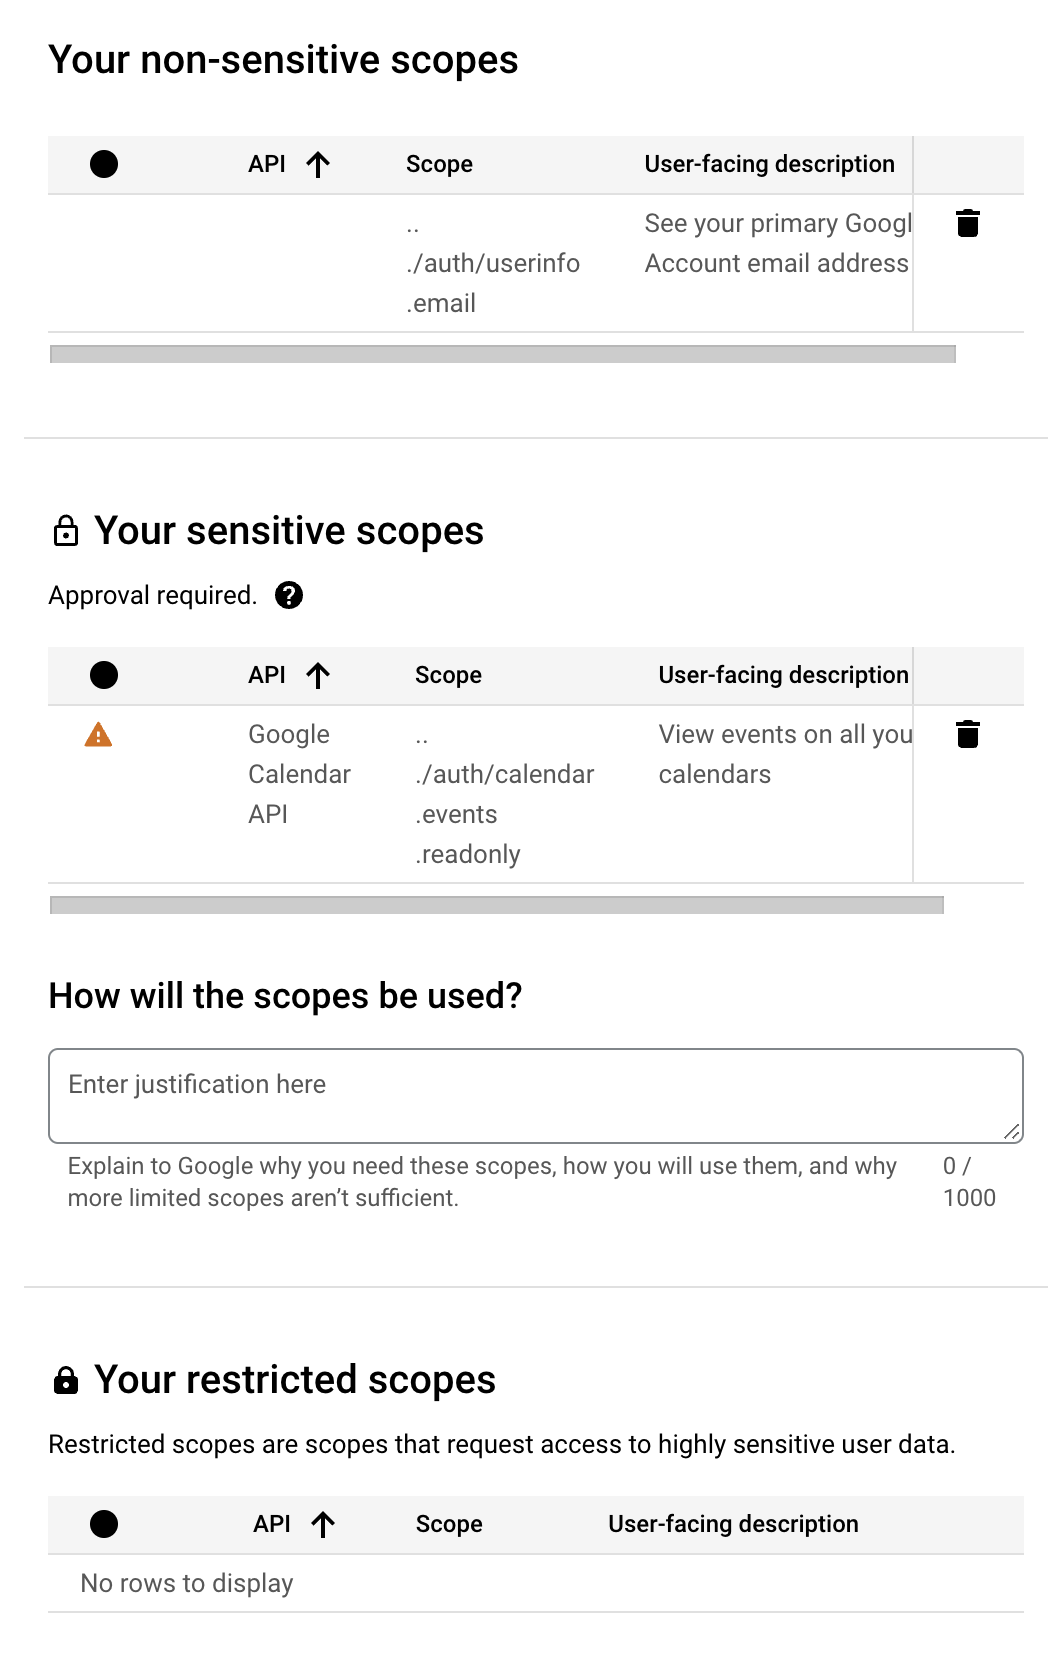
The next step is to select the scopes you are requesting through the OAuth interaction. The 2 scopes you require for the Recall Calendar integration are
calendar.events.readonly(sensitive scope)userinfo.email(non-sensitive scope)
For the "How will the scopes be used?" section, you should explain why your app requires calendar permissions as well as any other scopes you request. In terms of the calendar permissions specifically, something like:
"We need access to the /auth/calendar.events.readonly scope in order to automatically record our user's video conference meetings on their "primary" calendar. We read event data in order to find video conference events that our users have scheduled."
The demo video should walk through the process of signing up to your app, approving the permissions through the OAuth flow, and showing the interface to sync and mark meetings to be recorded. This is the official guide to the elements that need to be shown in the app demonstration video.
FAQ
Why did my calendar disconnect randomly all of a sudden with invalid_grant?
invalid_grant?If your Google OAuth client is in "testing", any connections made automatically expire after 7 days. After the client has been published successfully, connections will stay connected indefinitely unless OAuth permissions are revoked.
More info on this here.
When is the name of the invitee included on the calendar event?
Display name is not guaranteed to be populatedGoogle does not expose the exact requirements needed to ensure that display name shows up for all participants. For this reason, we do not recommend relying on this field to be populated.
For the organizer of the event (self = true) the Google Calendar API does not populate the displayName, presumably since the name is already known from their calendar connection or authentication to your platform.
For other attendees, this is more nuanced. By default, the displayName isn't populated, but Google has a few mechanisms to try to infer this by:
- Getting the name if the email belongs to the same Google workspace
- Getting the name from a Google Contact:
- There are many ways a Google Contact is automatically created. One common example is that Google automatically creates a Google Contact for other gmail/Google Workspace users that you've had an email with.
Updated 3 months ago