

Meeting Direct Connect for Zoom RTMS
Configure botless Zoom capture for audio, video, and transcripts with Recall.ai using the Zoom RTMS.
Integrating with Multiple Video Conferencing PlatformsIf you're looking to integrate with Zoom, Google Meet, Microsoft Teams, Webex, and other video conferencing platforms, you can use Recall.ai's Meeting Bot API or Desktop Recording SDK.
If you're looking to integrate with Zoom, specifically through RTMS, keep reading!
Zoom RTMS Limitations
- Requires a properly configured Zoom App, which will need to go through Zoom's application process
- You can only receive data (no sending messages or Output Media)
- Zoom RTMS doesn't provide chat messages (currently)
- Zoom RTMS doesn't support Breakout Rooms (currently)
For more information on Zoom RTMS and to figure out if Zoom RTMS is right for your use case, check out our guide on Zoom RTMS.
Zoom RTMS pricing
Zoom RTMS is a paid feature from Zoom and there are two ways to spend credits:
- Use your own Zoom RTMS credits on your Zoom account.
- For customers on a Recall.ai plan, RTMS credits are bundled into your usage so you do not need to buy your own RTMS credits from Zoom. Reach out to
[email protected]for more info.
Implementation Guide
Get your Recall.ai API key
- Sign up or login to your Recall.ai account
- Create your API key in the developers dashboard - you will use the API key in the quickstart.
Zoom Setup
-
Make sure you've updated your Zoom client to the latest version
-
Create or edit your Zoom App
-
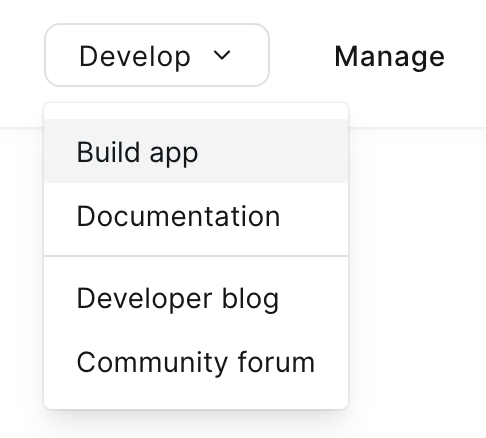
In the top right, click Develop -> Build App
-
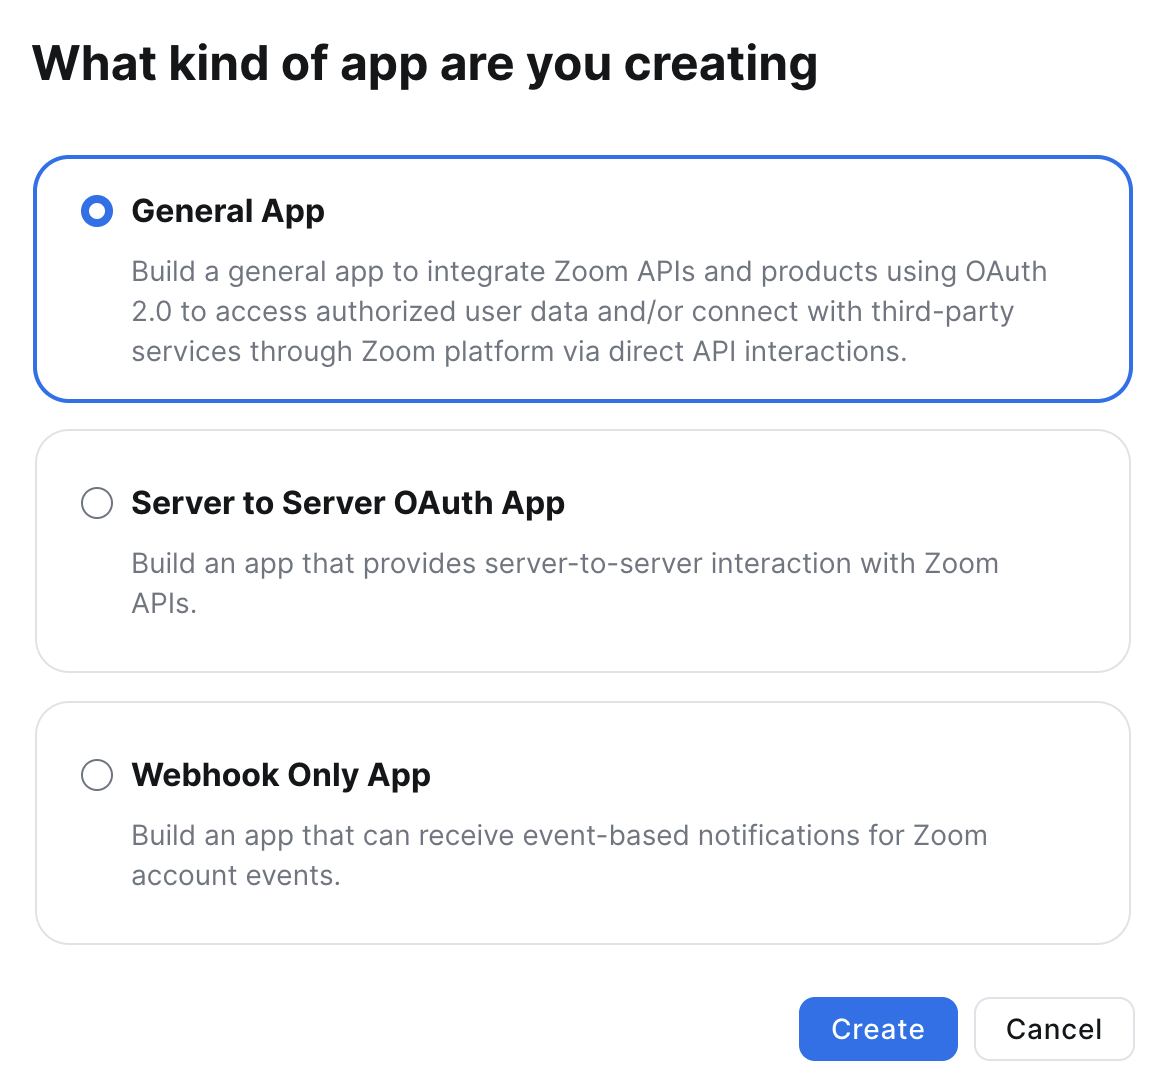
Select General App
-
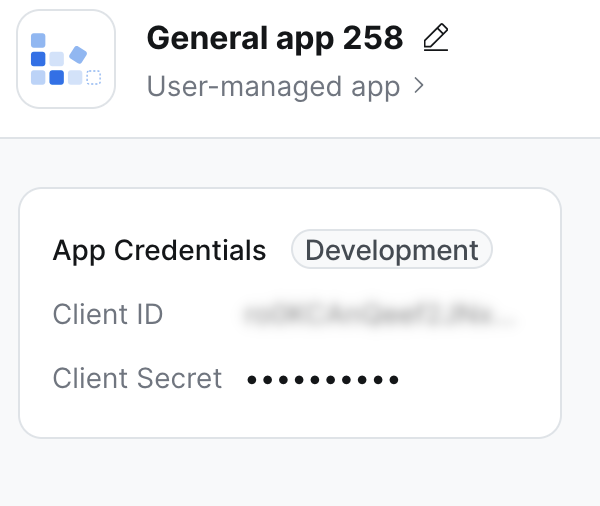
Copy your Client ID and Client Secret
-
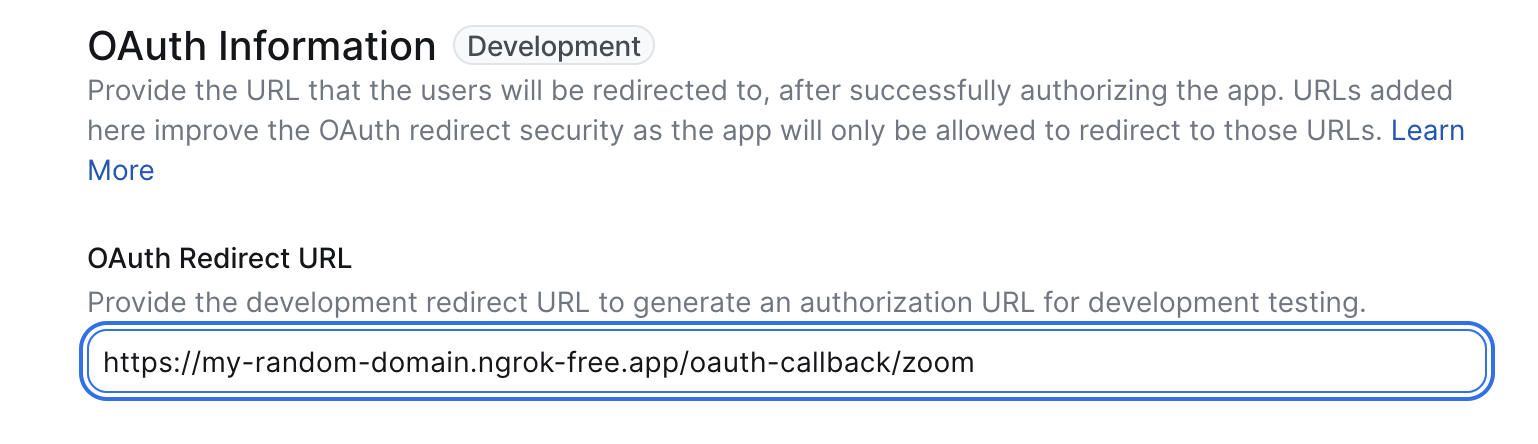
Click on "Basic Information" (below "Build your app")
- Add a OAuth Redirect URL (e.g. https://my-random-domain.ngrok-free.app/oauth-callback/zoom)
-
Click on "Access" (below "Build your app" and "Features" on the left)
-
Copy your Secret Token

-
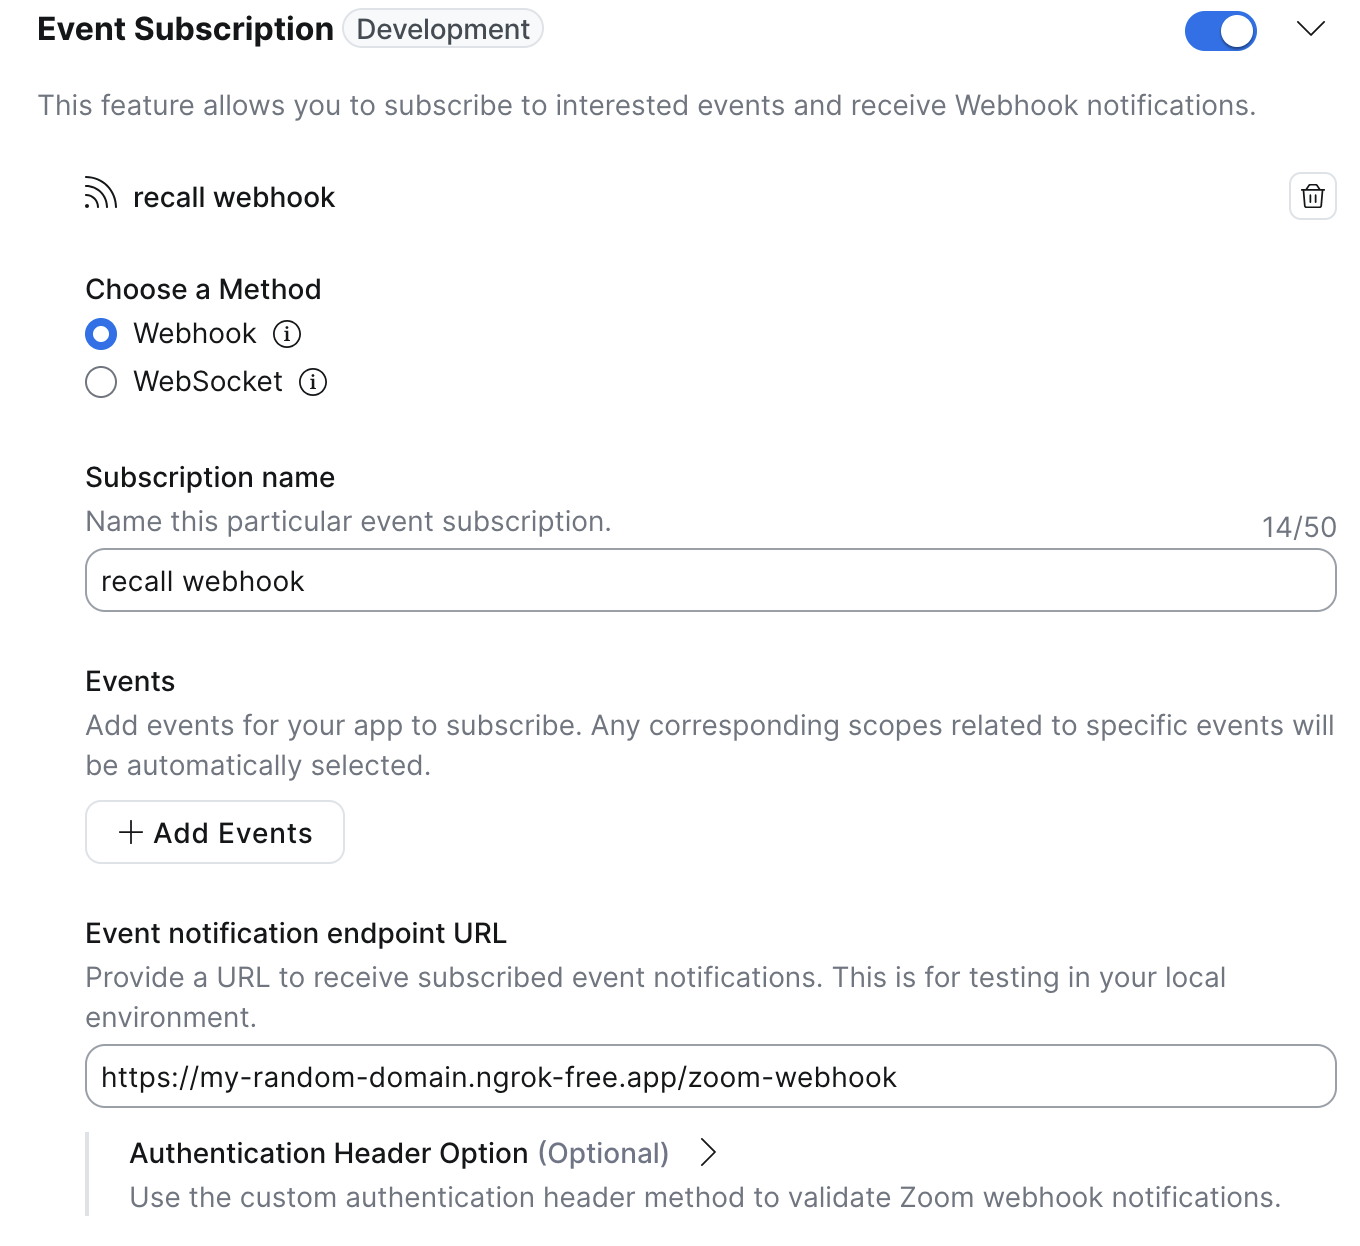
Enable "Event Subscription"
-
Name the webhook (e.g. My Recall RTMS webhook)
-
Choose option "Webhook"
-
Click "Add Events"
-
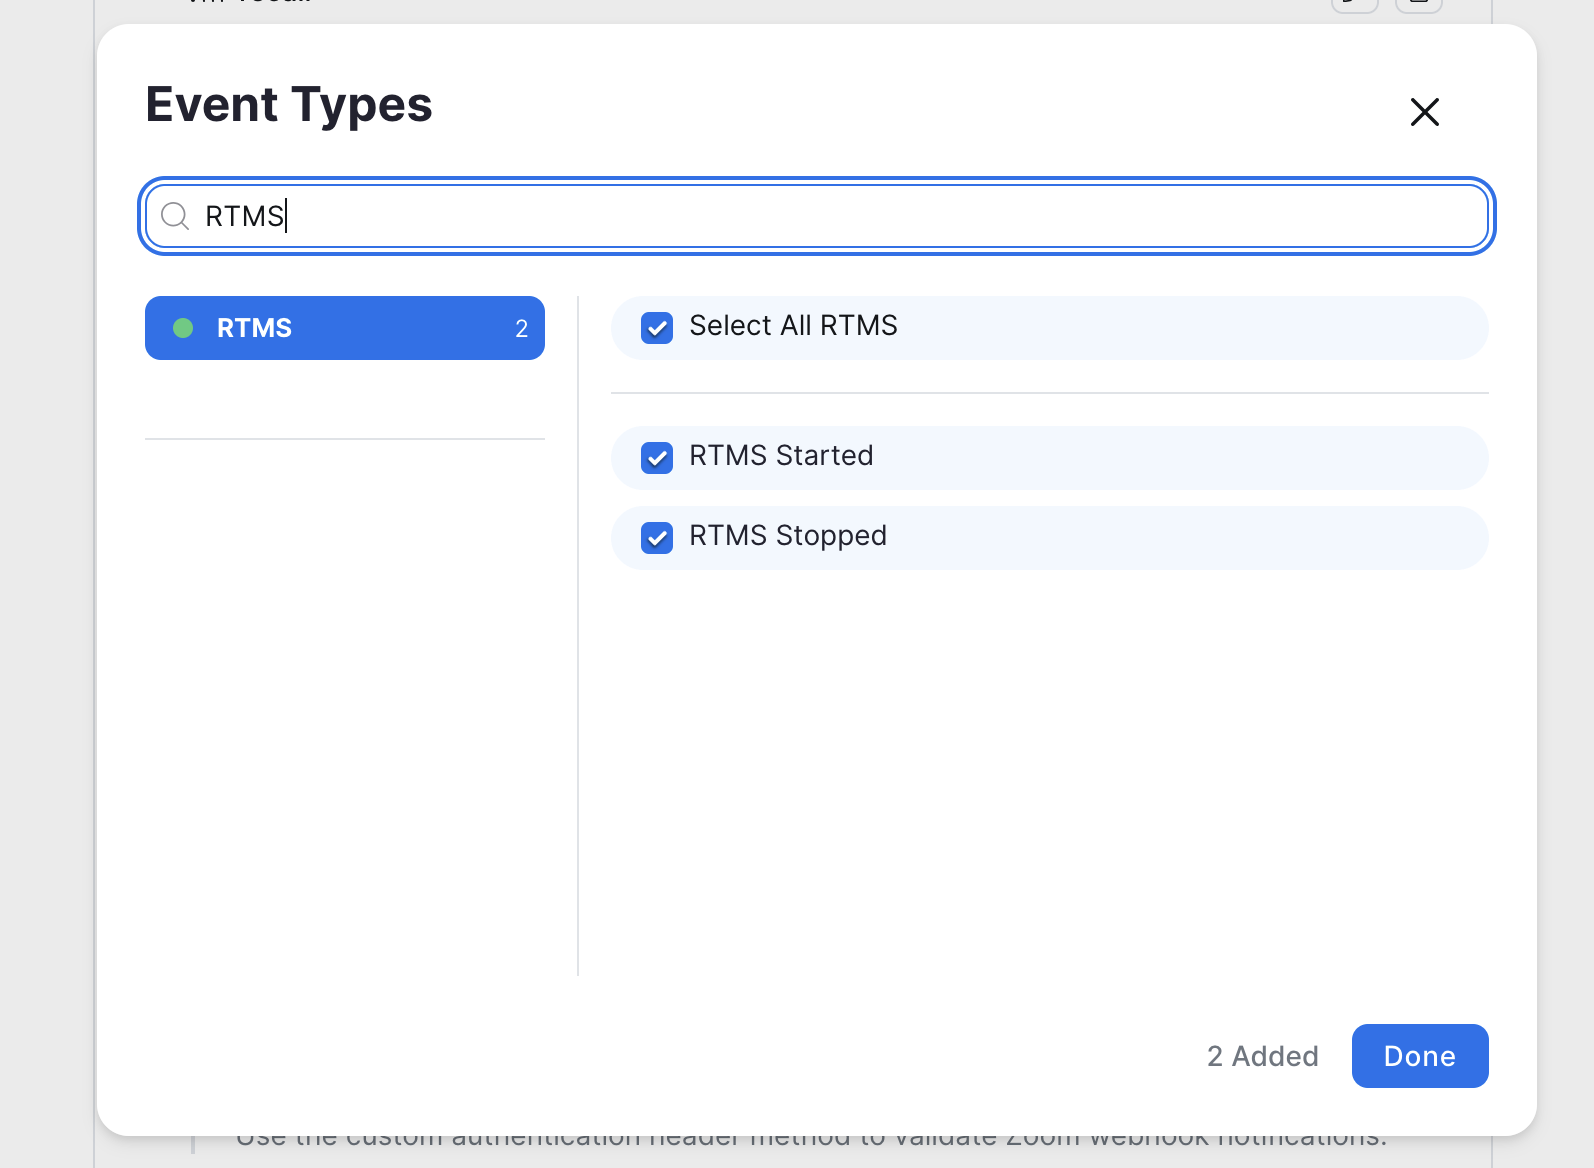
Search "RTMS" and select "Select All RTMS"
-
In "Event notification endpoint URL"
- Add the URL where you want to receive a webhook for Zoom RTMS notifications
- To get started, we recommend using an Ngrok static domain followed by /zoom-webhook
- e.g.
https://my-random-domain.ngrok-free.app/zoom-webhook
- e.g.
-
Select "Save"
-
-
-
-
-
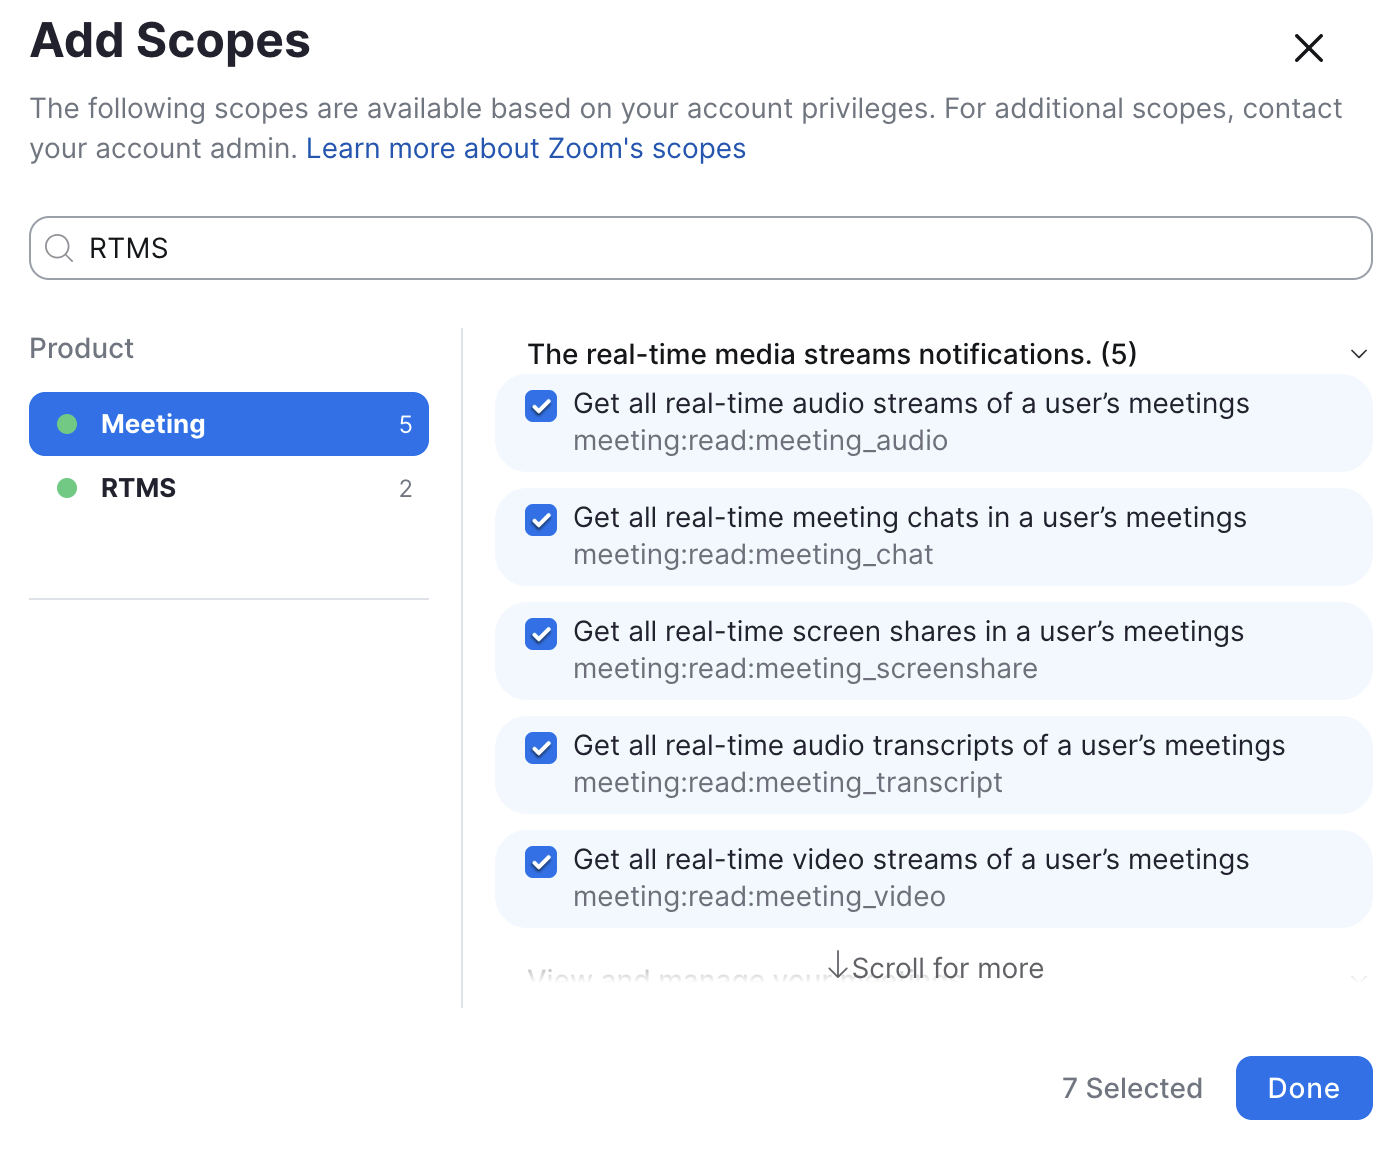
Select "Scopes" (below "Build your app" on the left), then +Add Scopes
- Search RTMS
- Under "Meeting" enable all the real-time media streams scopes:
- meeting:read:meeting_audio
- meeting:read:meeting_chat
- meeting:read:meeting_transcript
- meeting:read:meeting_screenshare
- meeting:read:meeting_video
- Under "RTMS" enable:
- rtms:read:rtms_started
- rtms:read:rtms_stopped
- Click "Done"
-
Click "Local Test" (below "Add your App" on the left)
-
Click "Add App Now"
-
You will see a confirmation prompt, click "Allow"
-
You will get redirected, the end URL may show an error but that's OK! We now have a Zoom RTMS App!
-
-
Go to your Zoom App Settings
- Under "Auto-start apps that access shared realtime meeting content" click "Choose an app to auto-start"
- In the dropdown select your new app
- Alternatively, you can:
- Choose to start RTMS on specific meetings from your API by calling this endpoint.
- Choose to start RTMS from your Zoom app by calling this function.
- Under "Auto-start apps that access shared realtime meeting content" click "Choose an app to auto-start"
Your Zoom App is now setup for RTMS!
Quickstart
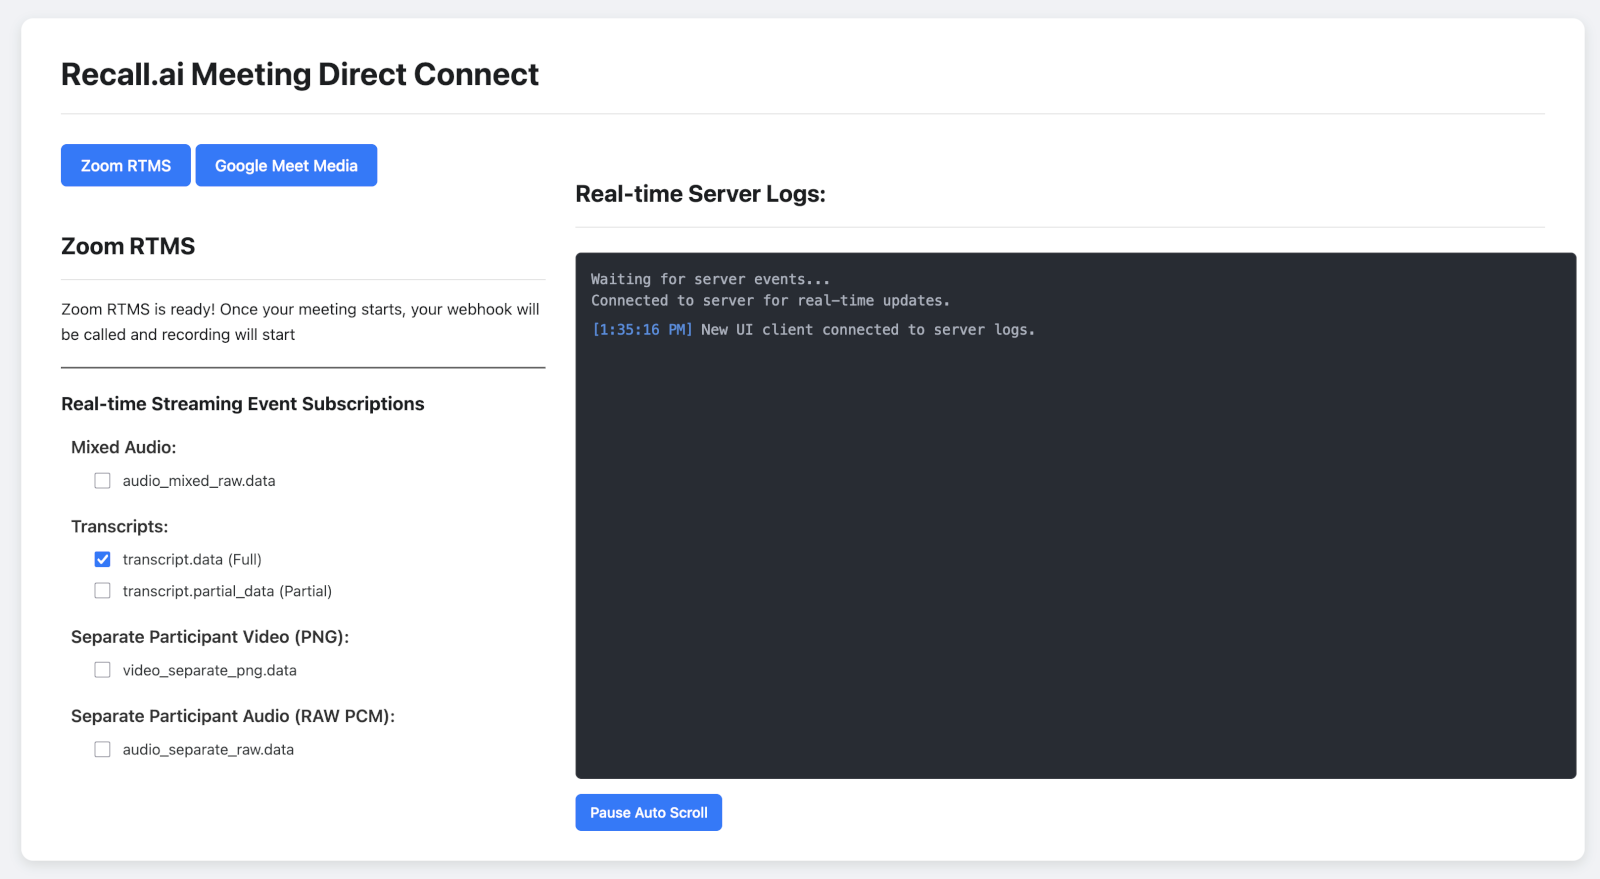
Use the Zoom RTMS sample app to see a working implementation.
There are multiple ways to connect to a Zoom meeting with RTMS, but we recommend beginning with the auto-start workflow.
Once a meeting starts, Zoom will call the webhook you provided in the Event notification endpoint URL, we'll assume the path is zoom-webhook. When Zoom provides a meeting.rtms_started event at that endpoint your server must:
- Generate an HMAC signature
- POST the Recall
/api/v1/meeting_direct_connectendpoint with:- The fields that Zoom provided
- An HMAC signature from your client secret
- Any additional options consistent with our Create Bot Endpoint
app.post('/zoom-webhook', async (req, res) => {
  const { event, payload } = req.body;

  // Handle URL validation event
  if (event === 'endpoint.url_validation' && payload?.plainToken) {
    // Generate a hash for URL validation using the plainToken and a secret token
    const hash = crypto
      .createHmac('sha256', ZOOM_SECRET_TOKEN)
      .update(payload.plainToken)
      .digest('hex');
    console.log('Responding to URL validation challenge');
    return res.json({
      plainToken: payload.plainToken,
      encryptedToken: hash,
    });
  }

  // Handle RTMS started event
  if (event === 'meeting.rtms_started') {
   await startRecordingRtms(event, payload);
  }

  // Respond with HTTP 200 status
  res.sendStatus(200);
});
async function startRecordingRtms(payload) {
  // Start the recording via Recall
  const { meeting_uuid, rtms_stream_id, server_urls } = payload;
  const response = await fetch(`https://us-east-1.recall.ai/api/v1/meeting_direct_connect`, {
    method: 'POST',
    headers: {
      'Authorization': `Token ${RECALL_API_KEY}`,
      'Content-Type': 'application/json'
    },
    body: JSON.stringify({
      zoom_rtms: {
        meeting_uuid,
        rtms_stream_id,
        server_urls,
        signature: generateSignature(meeting_uuid, rtms_stream_id)
      },
      // Other options (e.g. recordings, real time events, webhooks, transcriptions)
      // are consistent with https://docs.recall.ai/reference/bot_create
      recording_config: {
        video_mixed_mp4: {}
      }
    })
  });

  const recallRtms = await response.json();

  await saveRecordingToDatabase({
    recallId: recallRtms.id,
    status: recallRtms.status.code,
  });
}
function generateSignature(meetingUuid, streamId) {
  // Create a message string and generate an HMAC SHA256 signature
  const message = `${CLIENT_ID},${meetingUuid},${streamId}`;
  return crypto.createHmac('sha256', CLIENT_SECRET).update(message).digest('hex');
}
Get the Recording
To get any artifacts from the meeting, you’ll use the id received when creating the meeting_direct_connect to query the Retrieve Meeting Direct Connect endpoint to receive its current state and any artifacts of recordings or transcriptions
const meetingObj = await fetch(`https://us-east-1.recall.ai/api/v1/meeting_direct_connect/${my_mdc_id}`, {
  headers: {
    'Authorization': `Token ${RECALL_API_KEY}`
  }
}).then(r => r.json());
This object will contain a recordings section with pre-signed links to view your Meeting Direct Connect recordings
if (meetingObj.recordings.length == 0) {
  console.log("No recordings were made, maybe you didn’t request one?");
} else {
  var videoLink = meetingObj.recordings[0].media_shortcuts.data.download_url;
  console.log(`Your recording is ready to view at ${videoLink}`);
}
Next Steps
- If you want a botless form factor, but without the limitations of Meeting Direct Connect, you should check out the Desktop SDK.
- If you want to be able to input chat, audio, or video data into a meeting, check out Bots.
Updated 2 months ago